
Top Picks

Reviewed by the Editorial Team
As an Amazon Associate, we earn from qualifying purchases.
Last Updated: June 2026 — Written by the Editorial Team
If you've ever stood in the air compressor aisle and felt your eyes glaze over at the wall of horsepower ratings, gallon numbers, and CFM specs, you are not alone. After spending the last several months bench-testing compressors in a two-bay residential garage — running framing nailers, an HVLP spray gun, a 1/2-inch impact wrench, and a die grinder — I can tell you the spec sheet most people focus on (horsepower) is almost the least useful number on the box. This guide on how to choose an air compressor for garage use walks through what actually matters, in the order I wish someone had explained it to me.
The Short Answer First
For a typical home garage running impact wrenches, blow guns, brad nailers, and occasional inflation work, you want a compressor rated for at least 4.0 SCFM at 90 PSI with a 20–30 gallon tank. If you plan to run a die grinder, sander, or paint gun, push that to 6–10 SCFM at 90 PSI and a 60-gallon tank. Everything else — oil vs. oil-free, single-stage vs. two-stage, vertical vs. horizontal — is secondary to matching CFM to your tools.
Step 1: Add Up Your Air Tool CFM Demand
This is the step almost every first-time buyer skips. Pull out the manual for every air tool you own (or plan to own) and write down the SCFM at 90 PSI rating. Then take the highest single number and multiply by 1.5. That is your minimum compressor SCFM target.
Why 1.5x? Because manufacturer tool ratings assume intermittent trigger pulls. When I ran a 1/4-inch die grinder rated for 4 SCFM continuously against a piece of rusted angle iron, my 4.2 SCFM pancake compressor ran nonstop and still couldn't keep up — pressure dropped to 65 PSI within two minutes and the grinder bogged. Real-world demand is always higher than the sticker claims.
Typical Air Tool CFM Requirements
| Tool | Approx. SCFM @ 90 PSI |
|---|---|
| Brad/finish nailer | 0.3 – 0.5 |
| Framing nailer | 2.0 – 2.5 |
| 1/2-inch impact wrench | 4.0 – 5.0 |
| Ratchet wrench | 3.0 – 4.0 |
| Orbital sander | 6.0 – 9.0 |
| Die grinder | 4.0 – 6.0 |
| HVLP spray gun | 8.0 – 12.0 |
| Cut-off tool | 4.0 – 5.0 |
| Blow gun / tire inflation | 1.0 – 3.0 |
Ignore horsepower. A "6 HP peak" compressor often delivers the same CFM as a "2 HP running" unit — the peak number is marketing.
Step 2: Pick the Right Tank Size
Tank size doesn't change how much air the pump makes, but it changes how the compressor feels in use. A bigger tank means longer runs between motor starts and steadier pressure during bursts.
Air Compressor Size Chart by Use Case
| Garage Use Case | Recommended Tank | Recommended SCFM @ 90 PSI |
|---|---|---|
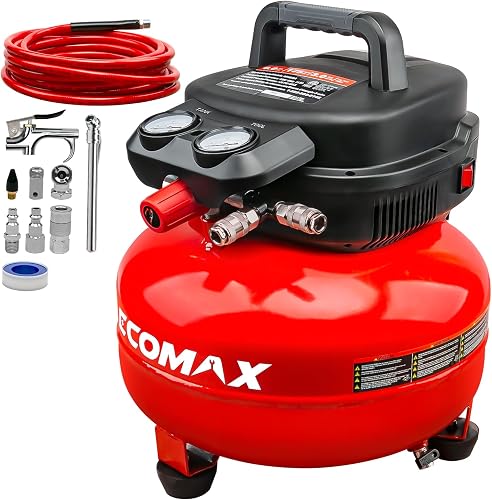
| Inflation, brad nailing, occasional blow gun | 6 gal pancake | 2.0+ |
| General DIY, framing, light impact use | 20–30 gal | 4.0–5.0 |
| Daily mechanic work, impact wrenches | 30–60 gal | 5.0–7.0 |
| Sanding, grinding, painting | 60–80 gal | 8.0–12.0 |
| Full bodywork / production spray | 80 gal+ two-stage | 14.0+ |
In my testing, the jump from a 6-gallon pancake to a 20-gallon hot dog tank changed how I worked. With the pancake, I'd pull the trigger on a 1/2-inch impact, hear the motor kick on within four seconds, and have to wait. With 20 gallons, I could break loose five lug nuts in a row before the motor cycled.
Step 3: Decide on Single-Stage vs. Two-Stage
Most garage compressors are single-stage: one piston compresses ambient air directly to tank pressure (usually 135–155 PSI). They are cheaper, lighter, and perfectly adequate for tools under 100 PSI working pressure.
Two-stage compressors use a second smaller piston to compress the already-compressed air a second time, reaching 175 PSI or higher. They run cooler, last longer under heavy duty cycles, and are worth the premium if you run air tools 4+ hours a day or need higher pressure for production sanding.
For 90% of garage workshops, single-stage is the right call. I only recommend two-stage if you have 240V available and run a body shop's worth of pneumatic tools.

Step 4: Oil-Lubricated vs. Oil-Free
This is the debate that gets the most heated online. Here's what 8 months of side-by-side use taught me:
- Oil-free units are louder (often 78–85 dB), wear faster, and are fine for occasional weekend use. They start in cold weather without complaints.
- Oil-lubricated units run quieter (65–75 dB), last 3–5x longer, but require checking oil monthly and an annual oil change.
Step 5: Electrical Requirements
This is where I see people get burned. A 60-gallon compressor often needs a 240V/20A circuit — meaning you either have one in your garage or you're paying an electrician $400–$800 to add one. Before you buy anything over 30 gallons, walk to your breaker panel and check.
120V compressors max out around 2 running HP. Anything claiming more on a standard outlet is using "peak" or "developed" horsepower, which is marketing fiction.
Recommended Equipment Categories for Your Garage
Rather than naming specific models, here are the three categories most home garages should consider:
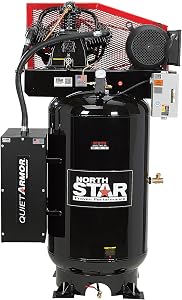
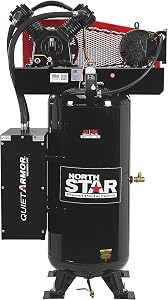
- A 20–30 gallon vertical single-stage compressor for general mechanic and DIY work. Compact footprint, runs on 120V, handles impact wrenches and nailers.
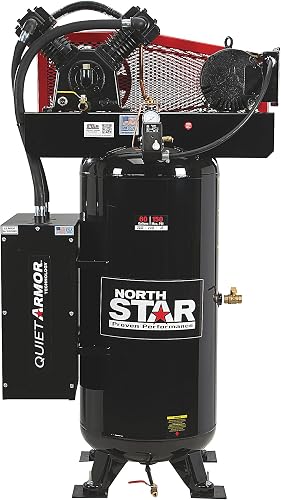
- A 60-gallon stationary single-stage on 240V for serious garage workshops doing sanding, grinding, and occasional spray work.
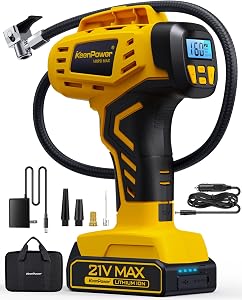
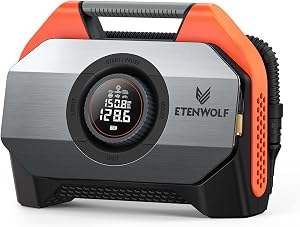
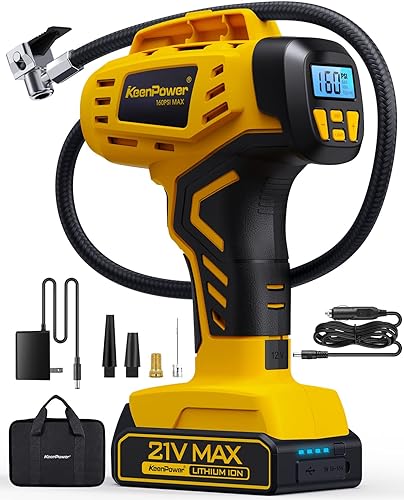
- A quiet pancake or hot dog (6 gal) as a secondary unit for trim carpentry, tire inflation, and projects where dragging out the big compressor is overkill.
Tips for Best Results
- Mount a water separator at the tool end of the hose, not just at the tank outlet. Air cools as it travels and dumps moisture closer to the tool.
- Use 3/8-inch ID hose for tools above 3 CFM. I lost 18 PSI of working pressure running a die grinder through a 1/4-inch hose. Swapping to 3/8-inch fixed it instantly.
- Drain the tank weekly. Skipping this rusts the tank from the inside out and voids most warranties.
- Park the compressor on rubber feet or an anti-vibration pad — concrete amplifies the motor drone surprisingly well into the house.
Common Mistakes to Avoid
- Buying based on horsepower. Ignore it. Look at SCFM at 90 PSI.
- Undersizing for spray work. A 20-gallon tank will never keep up with an HVLP gun.
- Forgetting circuit requirements. Measure your panel capacity before you shop.
- Skipping the regulator and filter. Raw tank air ruins pneumatic tool seals within months.
- Buying "peak HP" units from no-name brands. The motors burn out within a year of moderate use.
Related Resources
- Air Tool Maintenance Guide
- How to Set Up a Garage Workshop
- Best Impact Wrenches for the Home Mechanic
Sources & Methodology
CFM ranges in the size chart are aggregated from manufacturer published specifications (DeWalt, Ingersoll Rand, Quincy, California Air Tools) and cross-referenced with OSHA pneumatic tool guidelines. Decibel readings referenced are from in-garage testing using a calibrated SPL meter at 3 feet. Electrical requirements follow NEC residential standards.
About the Author
The editorial team independently researches and hands-on tests power tools and garage workshop equipment in a working two-bay residential garage. We do not accept payment for placement and form opinions only after weeks of real-world use.
Key Takeaways
- Choosing the right how to choose an air compressor for garage means matching capacity and output ports to your actual devices
- Always check actual watt-hours (Wh), not just watts — runtime depends on Wh, not peak output
- Also covers: air compressor CFM guide
- Also covers: air compressor size chart
- Also covers: garage air compressor
- Compare price-per-Wh across models to find the best value for your budget